
In this article:
- Editing your confirmation email
- Adding a link
- Previewing your email
Editing your confirmation email
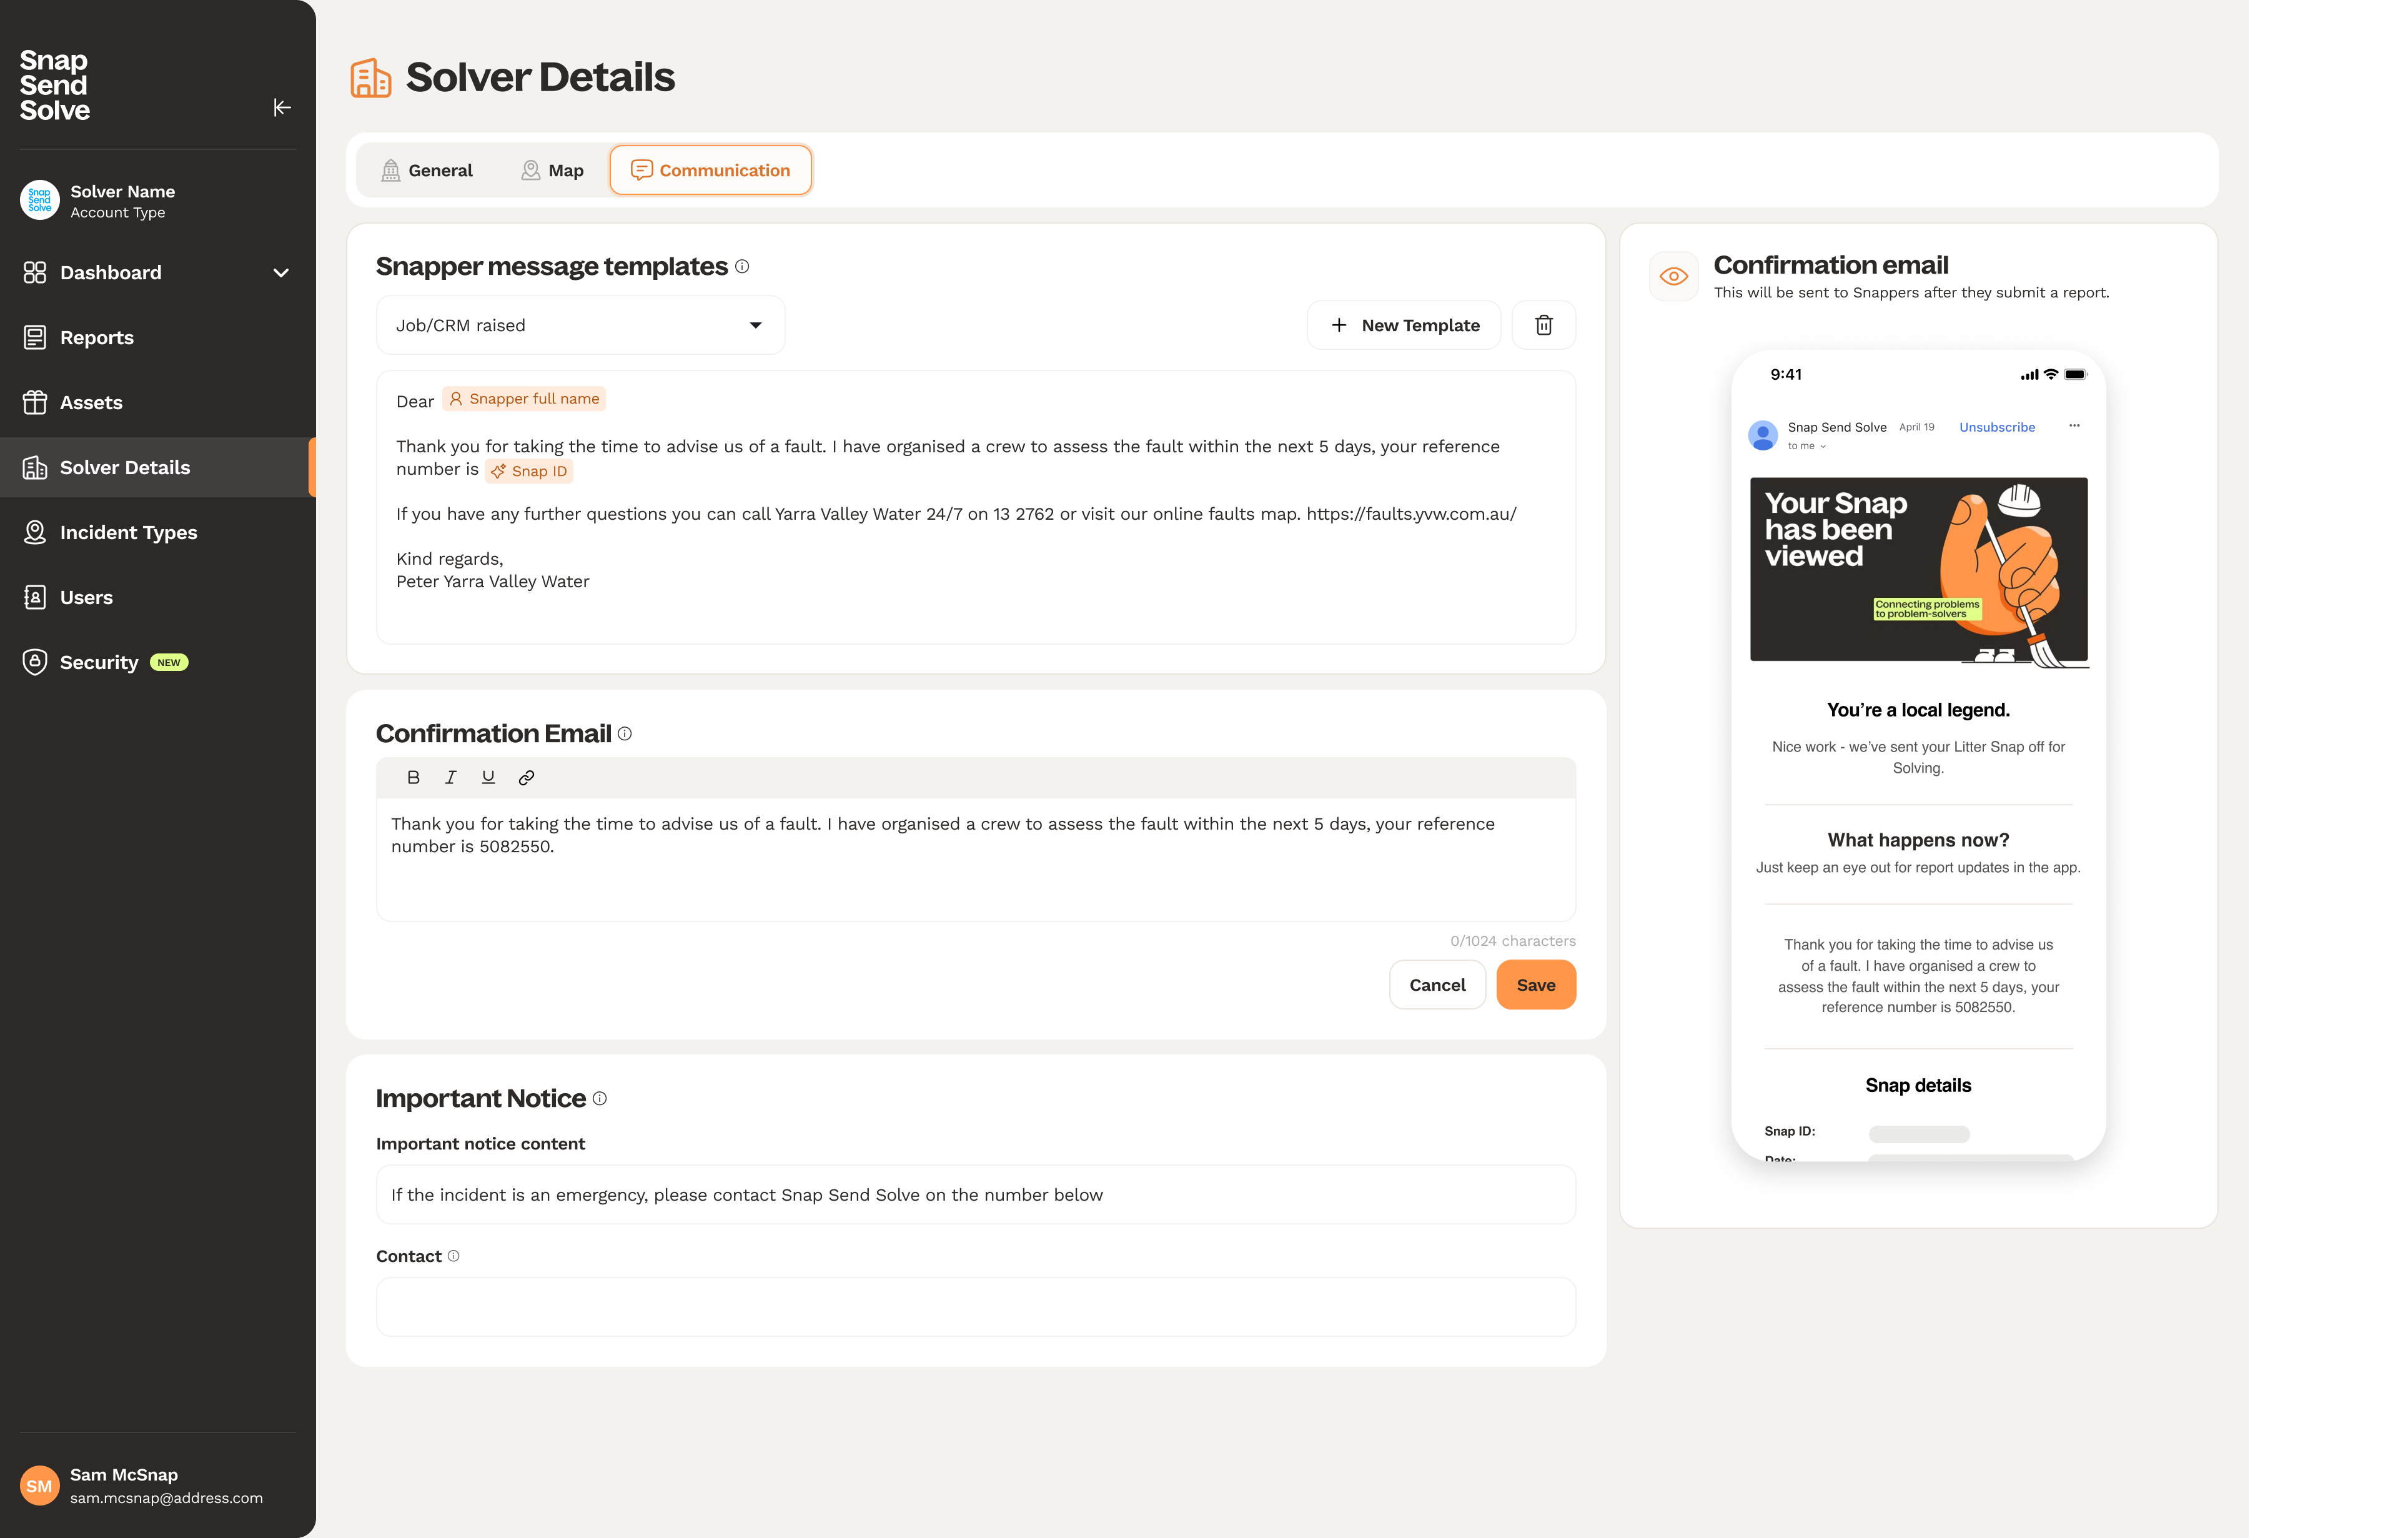
- Click Solver Details in the left menu and open the Communication tab and navigate to the Confirmation Email section below Snapper Message Templates.
- In Confirmation Email, click into the text box.
- Write your message. Use the toolbar for bold, italic and links.
- Click Save.
Adding a link
- Place your cursor where the link should go, or select the text you want to link.
- Click the link icon in the toolbar.
- In the Insert link window, enter the Display text and the URL.
- Click Insert link.
Previewing your email
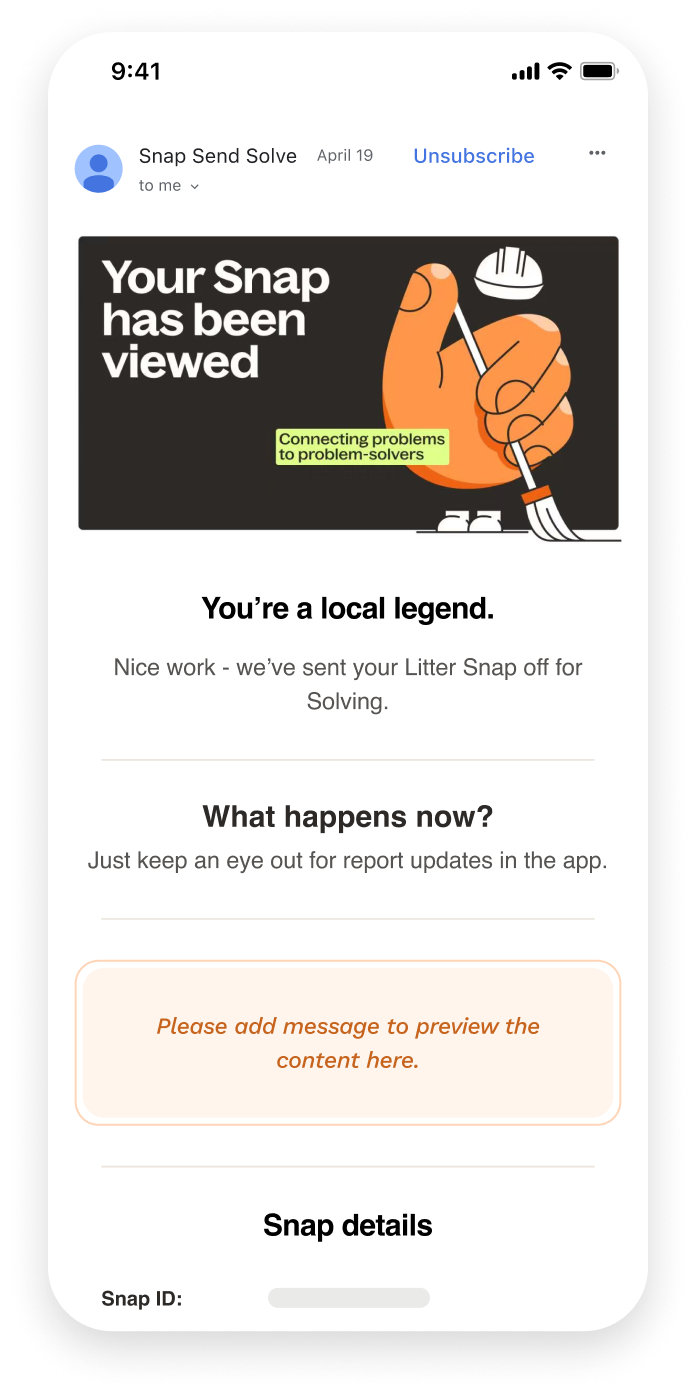
Click into Confirmation Email and the preview panel on the right switches to the email view. Your text appears in the designated section, inside the standard Snap Send Solve email layout, so you can check how Snappers will see it.
Summary
You can now customise the confirmation email Snappers receive, add links and preview it before saving.