
In this article:
- Before you start
- Turning on SSO
- Choosing a configuration type
- Setting up tenant-specific SSO
- Enforcing SSO
- Requesting access
Before you start
Permissions: Only Solver Admins can see the Security page. SSO is available on Enterprise plans where SSO is included in your contract.
For tenant-specific SSO, you'll need your organisation's Azure App ID and Directory Tenant ID. You can find both on your app's Overview page in the Microsoft Entra ID admin centre.
Turning on SSO
- In the left menu, click Security.
- Under Single Sign-On (SSO), switch on the SSO Status toggle.
Choosing a configuration type
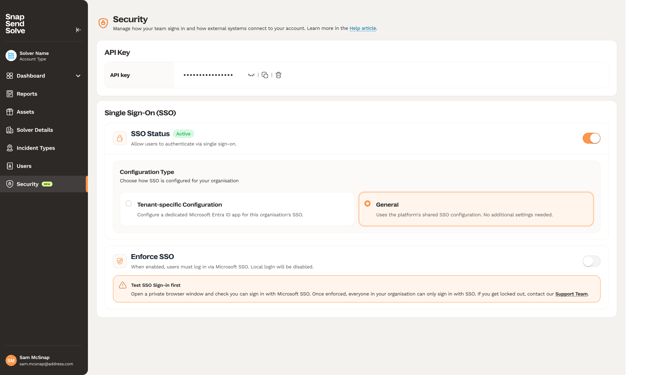
Under Configuration Type, select how SSO is set up for your organisation:
- Tenant-specific Configuration (default): uses a dedicated Microsoft ID AD app for your organisation.
- General: uses the platform's shared SSO configuration. No additional settings are needed.
Choose Tenant-specific if your IT team needs SSO to run through your own Entra ID app. Choose General if you don't need a dedicated app. A tenant-specific configuration will automatically create new users in the Portal when they log in for the first time whereas users will still need to be manually added under a General configuration.
Setting up tenant-specific SSO
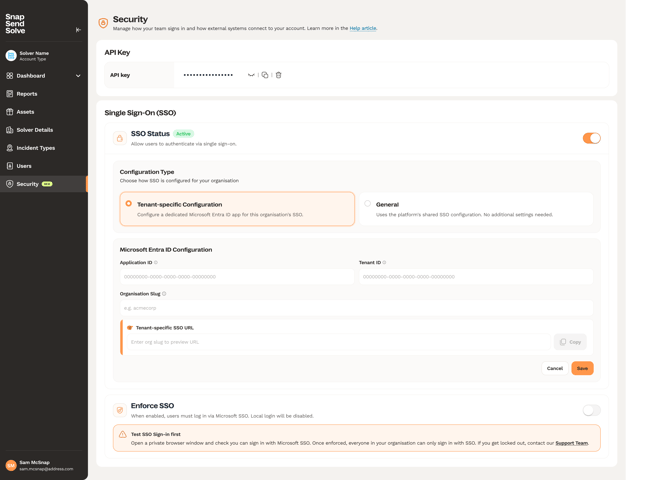
- Under Configuration Type, select Tenant-specific Configuration.
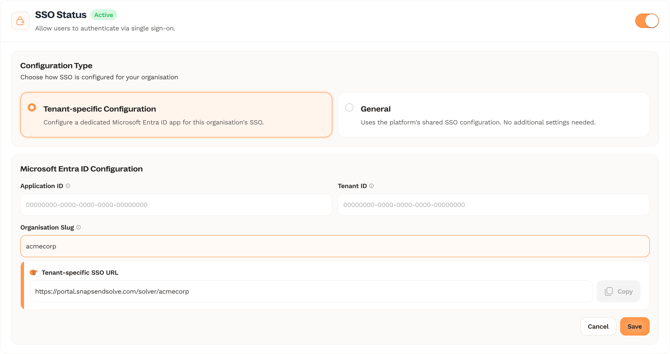
- In Microsoft Entra ID Configuration, enter your Application ID and Tenant ID.
- Enter your Organisation Slug, a short unique name for your organisation, e.g. acmecorp.
- Check the Tenant-specific SSO URL. It populates automatically from your slug. Click Copy to share the sign-in link with your team.
- Click Save.
Note: The Organisation Slug must be unique, between 3 and 255 characters.
Enforcing SSO
- Make sure SSO Status is on. The Enforce SSO toggle is only available when SSO is enabled.
- Open a private browser window and check that you can sign in with Microsoft SSO.
- Back on the Security page, switch on the Enforce SSO toggle.
Note: When Enforce SSO is on, username and password login is turned off for everyone in your organisation. Test your SSO sign-in first. If you get locked out after enforcing SSO, contact the Snap Send Solve Support Team.
Requesting access
If SSO isn't included in your contract, the Security page shows a Get in Touch banner instead of the SSO settings. Click to find out more about SSO and talk to the Snap Send Solve team. Once SSO is enabled for your account, the settings appear on your Security page.
Summary
You can now set up Microsoft SSO for your organisation, choose between tenant-specific and general configuration, and require everyone to sign in with SSO.