
In this article:
Creating a Work Order
-
Navigate to the Reports tab in the left hand navigation.
-
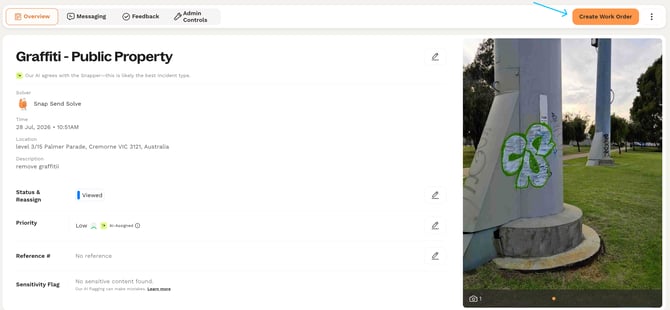
Click on a specific report and click on Create Work Order.
-
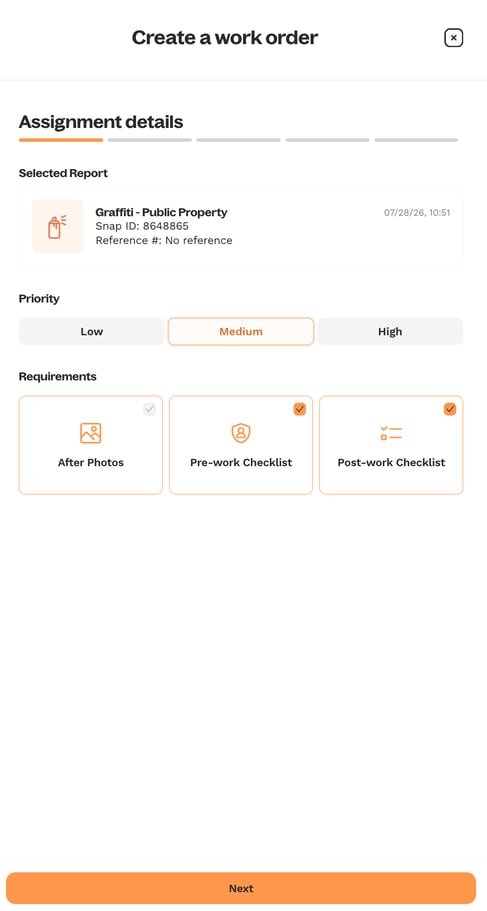
Assign a Work Order priority (low, medium or high) to classify the urgency & risk to the community.
-
Select the requirements for the job: a pre-work checklist and/or post-work checklist. After Photos are currently mandatory for each job.
-
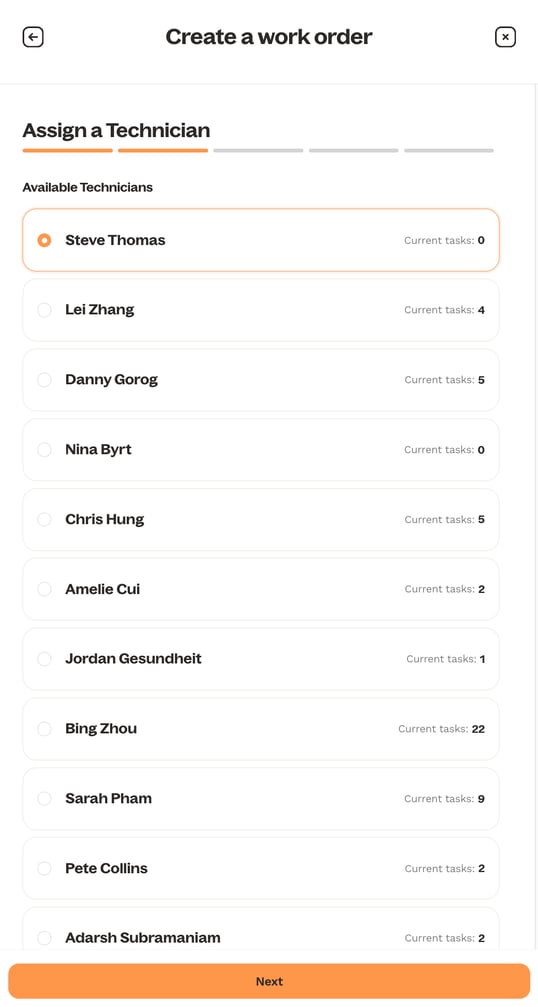
Click Next and then assign a technician. The number of tasks that they currently have assigned to them will be shown to help you manage their capacity.
-
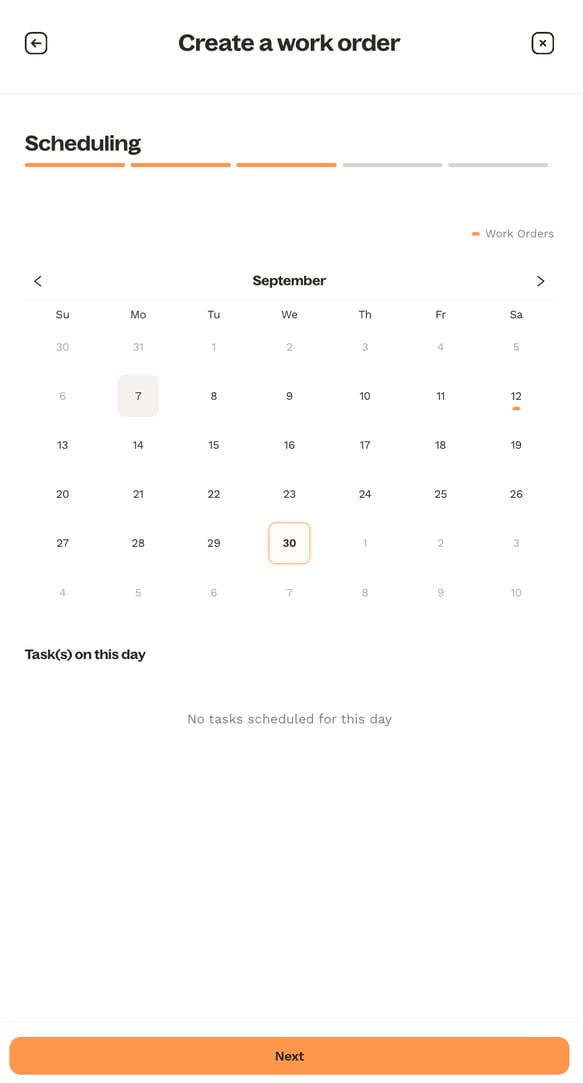
Click Next and choose a scheduled date. Any jobs that a technician already has on a day will be indicated in orange.
-
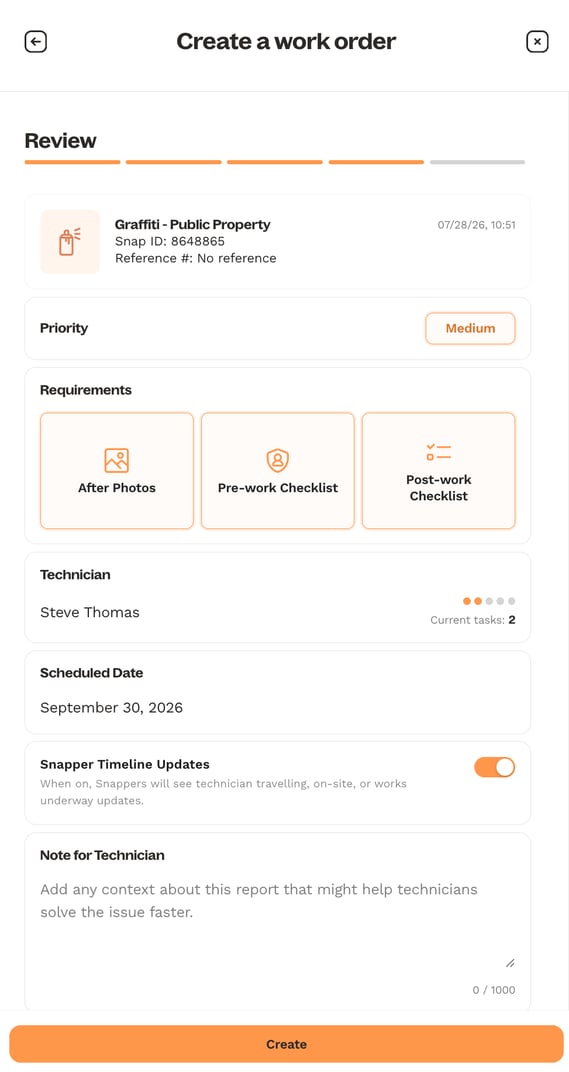
Click Next and review the Work Order’s details.
-
Toggle on/off Snapper Timeline Updates. These give Snappers more granular details about when a technician is travelling to a site, on site and conducting work.
-
Leave a note for the technician with details about the work required.
-
Click Create and the Work Order will be created and ready to view by a technician in the Solve app.
Editing a Work Order
You can edit a Work Order as long as it isn't already in progress or completed. An in progress work order includes when the technician is travelling, on site or currently undertaking works.
-
Open the Work Order.
-
Click Edit.
-
Update the technician, date, checklists or notes as needed.
-
Click Save
Summary
You've created a Work Order, set its requirements and assigned it to a technician. Next, see how to track its status as it moves through the field.